
Introduction
This support article describes the practical details of how to configure and use a IDS uEye USB camera.
Click here for installation details
For GigE (network IDS cameras) see this article: https://support.swingcatalyst.com/hc/en-us/articles/115003700393
Applies To
- Getting started with a IDS uEye USB camera and Swing Catalyst.
Description of the Camera
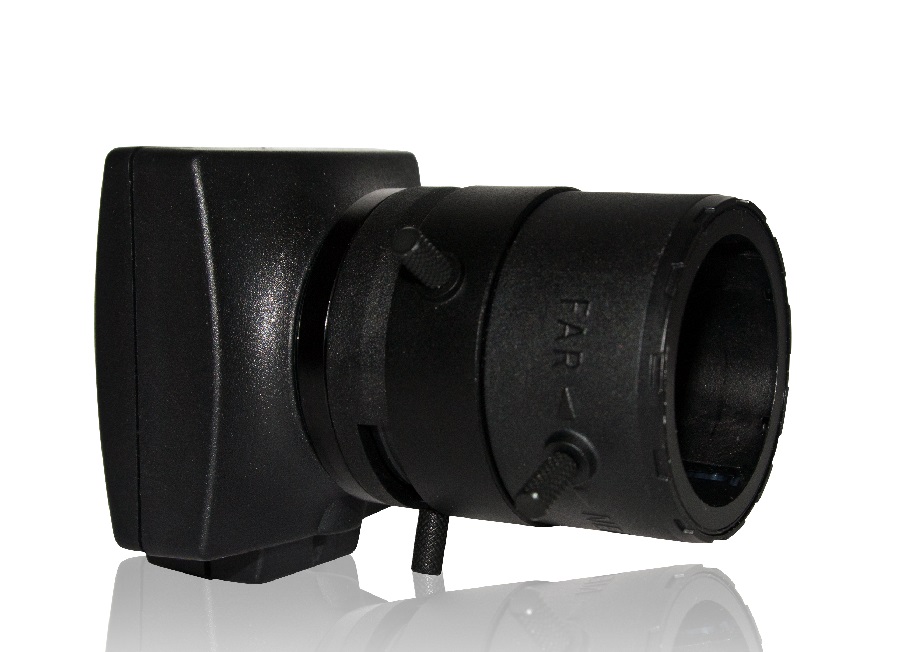
The uEye USB camera consists of three separate components:
- The camera itself
- The lens
- The USB cable
Camera
The camera itself has no physical adjustments, all settings are controlled by the software.
Lens
The provided lens has 3 adjustment rings, in order from the camera and out these are:
- Zoom
- Iris
- Focus
Zoom/Focus
Iris
The Software Settings
In Swing Catalyst all camera settings are available through the "Advanced" button in "Camera Settings", which can be found in the main menu under Settings - Cameras.
By clicking the "Advanced" button the Advanced Camera Settings dialog becomes visible.
For uEye cameras there are some important settings which determine several key characteristics of the camera:
Pixel Clock
The Pixel Clock is essentially a "speed" setting, increasing this will increase the maximum framerate that is available, but increasing it too much may lead to dropped frames.
Frame Rate
The frame rate setting allows both automatic and manual configuration of the frame rate.
It is recommended that a manual setting is used, since the automatic mode disables other automatic features such as auto gain.
Exposure Shutter
A low shutter speed is essential for capturing fast movement and reducing motion blur.
For a golf swing it is recommended to use a maximum of 2ms (milliseconds) exposure to get a decent image.
For a very sharp image an exposure setting of 0.5ms is good, but will require a lot of light and is only recommended for outdoor use.
It is possible to set the Exposure Shutter in automatic mode, with an upper limit through the "Max" auto parameter, this is a good option to enable the camera to adjust to various light conditions while maintaining good image quality.
Gain
Gain increase image brightness, but also introduces more noise in the image.
In most cases it is recommended to use Auto gain to allow the camera to self-adjust.
White Balance
It is recommended that white balance is set to Auto to enable the camera to adjust the color balance in the image.
If the colors in the image appear wrong use the Manual setting to tweak the Red, Green and Blue parameters.
Maximize Frames Per Second (FPS)
Your maximum FPS will vary depending on your computer specs. When dropped frames occur it means the system can't keep up with all the data and that you need to decrease the speed.
Here is a step by step procedure to help you maximize your camera performance.
- Go to Main Menu -> Settings -> Cameras.
- Click the "Advanced" button on your uEye camera.
- In the advanced settings dialog, navigate to the Camera tab.
- Click the "Play" button in the video preview panel to start streaming live video.
- Drag the "Speed (pixel clock)" slider to the right until you see the dropped frames counter starting to increase (bottom right).
- Drag the slider slightly to the left until it is no longer dropping frames, and then some. As an example, if you find it stops dropping frames at 38, then set it at 35.
Once you find the speed where the frame rate is as high as possible without losing frames, you are all set.

Troubleshooting
Dropped frames/"Jittery" image on playback
If the camera is dropping frames the USB bus on the computer may not handle the bandwidth requirements of the camera.
Try to decrease the Speed (pixel clock) until the camera is not dropping frames.
Unable to focus at all (very blurry image)
If you are unable to focus the camera at all (using the focus adjustment ring) check that there is no metal ring mounted between the camera and a lens.
The metal ring is a CS-to-C-mount adapter ring and is not needed when both the camera and the lens are CS-mount.
Upgrading to Windows 10
Please note there is a known issue when using Windows updates to upgrade to Windows 10. If you encounter an error or "blue screen" when trying to upgrade to Windows 10, you will need to first uninstall the IDS software via "programs and features". Then reinstall the driver from our downloads page after upgrading.