
Swing Catalyst Motion Capture Settings
Introduction
This article describes how to setup and configure the Motion Capture functionality within Swing Catalyst. This feature may not be available for all license types, please see our Motion Capture FAQ for more information.
Requirements
- Components need to be installed into the components directory.
Your computer needs to meet our PC specification recommendations, most importantly is that the graphics card meets our recommendations.
Configuration
The Motion Capture settings have their own page: open Settings > Motion Capture. From here you can select or change execution providers and batch size.
Use the batch size recommended for your graphics card on this page.
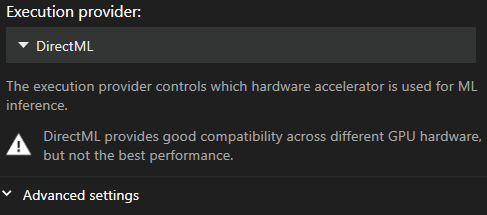
Recommended Execution Provider
NVIDIA
NVIDIA RTX 3060 or newer GPU -> TensorRT
If TensorRT doesn’t work, try CUDA
Other graphics cards
- DirectML
The default is DirectML as it’s the most compatible provider. It is also unfortunately the slowest.
TensorRT is usually the fastest provider, and CUDA is usually faster than DirectML. Run the benchmark to see which is fastest on your computer.
- CUDA uses significantly more GPU memory (VRAM) than TensorRT, please try to reduce the batch size if you use CUDA
Component download
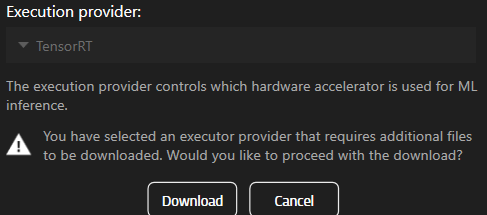
If you select an engine that is not installed yet, the app asks you to download it.
From version 26.2, all motion capture models and the GPU acceleration files are downloaded from Settings > Optional Features. When components are missing, a banner at the top of the Motion Capture page tells you how many are needed. Click Download all needed to fetch them. The full guide is Optional Features: downloading motion capture components .
In version 25.2, the download prompt looks like this:
Performance Benchmark
The benchmark dialog helps you find the optimal settings for your GPU. Three modes are available:
- Quick (~30 seconds): A fast adaptive test that identifies the best execution provider and batch size. Recommended for most users.
- Medium (~2 minutes): Tests all execution providers at key batch sizes.
- Full (~7 minutes): An exhaustive test across all combinations of execution providers, batch sizes, and preprocessing strategies. Use this for detailed analysis or if the Quick results seem unexpected.
After benchmarking, click Apply Best Settings to automatically configure the optimal execution provider, batch size, and preprocessing strategy for your GPU.
Recommended Batch size
Larger batch sizes usually give better performance. Use the recommendation shown on the settings page, or run the benchmark and click Apply Best Settings. If you’re using other software at the same time that requires graphics resources it may be beneficial to try a lower batch size. Ultimately the best batch size may depend on your work flow and what kind of programs you have running in addition to Swing Catalyst.
Advanced Settings
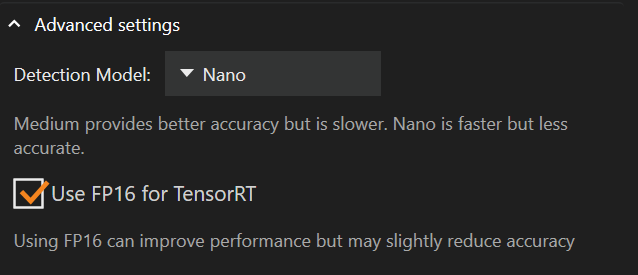
Below the execution provider settings are the advanced settings where you can change the detection model. To use FP16, select TensorRT, then tick Reduced Precision (FP16) in the TensorRT engine card.
Changing the detection model from Medium to Nano can reduce how much memory your graphics card uses and improve performance, at the cost of accuracy.
If you have switched to Nano and are struggling to get a decent detection, change the model back to Medium, restart Swing Catalyst and try again.
The default detection model is Medium
Reduced Precision (FP16) is not checked by default
FP16
Using FP16 can reduce memory usage and improve performance (at the cost of accuracy).
It may also produce more inconsistent results between recordings than the default FP32. It may be worth trying if you are having problems with performance or if you’re running out of memory.
Performance comparisons
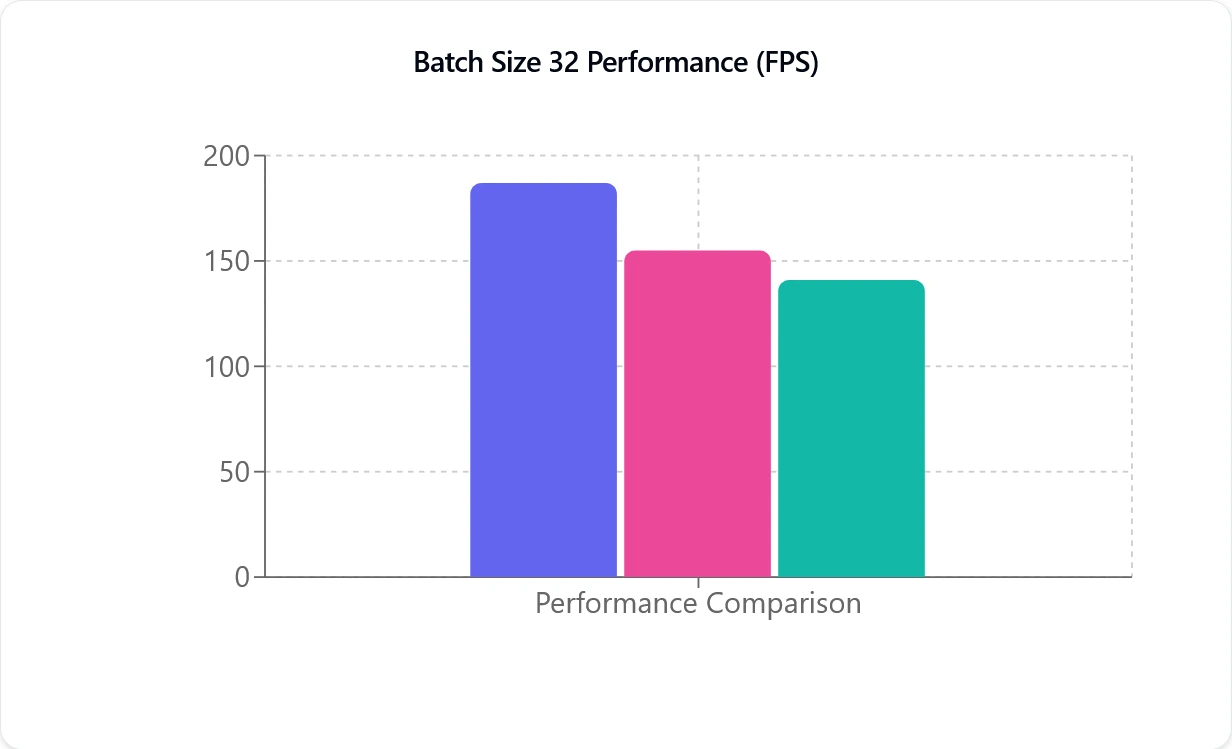
TensorRT (purple), CUDA (pink), and DirectML (green), left to right. The Y axis (FPS) is the amount of frame per second the motion capture model is capable of processing and isn’t directly related to your camera’s frame rate.
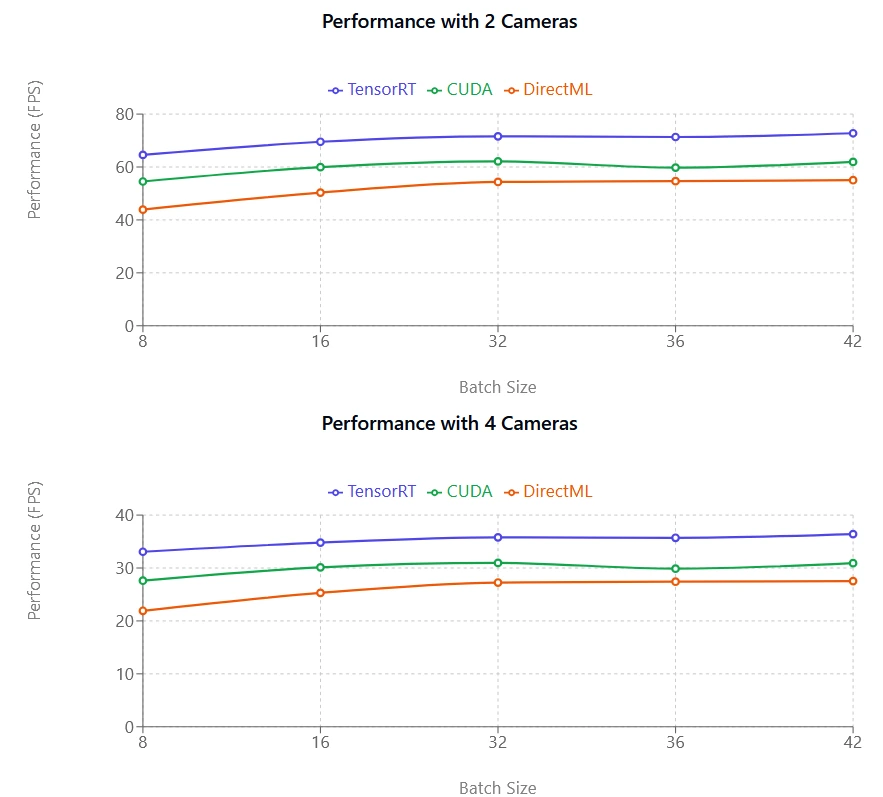
The performance metric (FPS) is how many frames per second are processed, the higher number the quicker it will process. As you can see in the above illustration both CUDA and TensorRT are almost linear. E.g. You go from one to two cameras you see almost half the performance. This performance hit is less noticeable with newer NVIDIA graphics cards.