
Auto-Framing: Automatic Zoom on the Athlete
What is auto-framing?
Auto-framing zooms the video in on the athlete for you. Instead of holding a fixed zoom level, the viewport picks a zoom and position that keeps the athlete centered with a comfortable amount of space around them. This works both during playback of recorded takes and in the live camera view.
Auto-framing uses motion capture data to know where the athlete is, so it is only available on takes that have motion capture data. See When framing is not available below.
There are two framing modes:
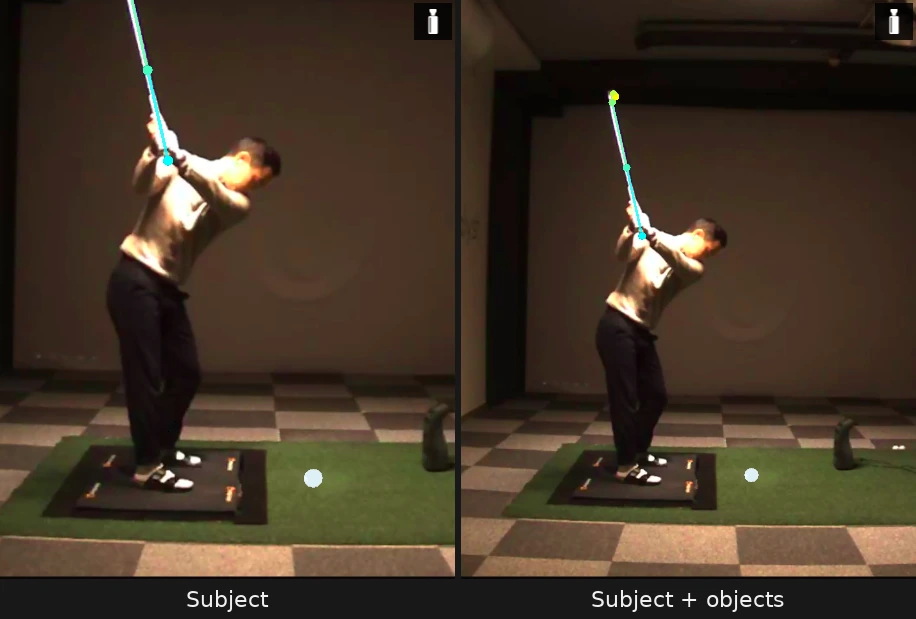
- Subject zooms in on the athlete alone. This gives the tightest view of the body.
- Subject + objects zooms in on the athlete together with the tracked golf club, so the club stays in frame from address to follow-through. The golf club is the only object auto-framing keeps in frame; see Object detection .
If you turn on auto-framing without choosing a mode, you get Subject + objects. With a tight fixed zoom, the club head is easily cropped out at the top of the backswing or in the follow-through.
Turning it on and off
You can control auto-framing from two places:
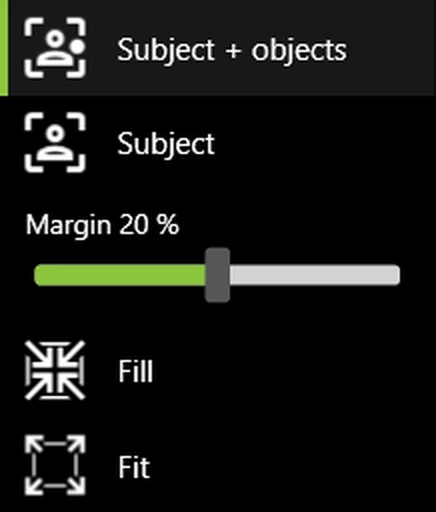
- The viewport toolbar has a button for each mode. Hover over them to see the tooltips: “Auto-zoom to keep subject centered” (Subject) and “Auto-zoom to keep the subject and tracked objects in frame” (Subject + objects).
- The tools panel has a Zoom Mode section with the same choices as radio buttons, next to Fill and Fit, together with the Margin slider.
Clicking a mode turns it on. Clicking the mode that is already active turns framing off again; the viewport keeps the zoom it had reached, so the picture does not jump. Clicking the other mode switches directly between the two, in one click.
The zoom mode is one setting for the whole program, not per recording. A framing mode you leave on stays on for the next recording you open and after you restart the software. If you turn framing off, that is what is remembered instead.
The margin slider
The Margin slider controls how much space is left around the athlete, from 0 to 40 percent. The default is 20 percent.
- The percentage is relative to the height of the framed area, and the same gap is applied on all four sides, so the space around the athlete looks even.
- The margin is shared by both framing modes. Switching between Subject and Subject + objects does not change the amount of breathing room.
- Changes apply immediately, also while the video is paused, so you can drag the slider and watch the zoom respond.
- The value is one setting for the whole program. It applies to every recording and stays after you restart the software.
At 0 percent the frame hugs the detected body, which usually feels too tight. Higher values give a calmer, wider view.
Which part of the take sets the zoom
During playback, auto-framing looks at the athlete’s position across a span of the take and picks one zoom level that covers all of it. The zoom is steady during playback; it does not drift or follow the athlete frame by frame.
The span it measures is the marked part of the take, from the first marker to the last. Outside the markers the athlete may be walking in or already done, and including those frames would zoom the view out until it barely crops at all. If the take has no markers, the whole take is measured.
For swing activities, where the last marker sits at impact, the measured span extends half a second past the last marker. This keeps the follow-through in frame: the club is furthest from the body right after impact, and cutting the measurement at impact would crop exactly the frames the feature is meant to show.
If the framing on a take looks wider than you expect, check the markers. Markers placed far apart, or a take without markers, make the framing cover more movement and therefore zoom out further. See What are markers? for how to review and adjust them.
The ball is not included
Subject + objects frames the club, not the ball. This is deliberate. The ball sits on the ground before the strike and then leaves the picture entirely, so including it would drag the framing away from the athlete and stretch the view for the whole take because of a single ball flight.
If you want to follow the ball, use the ball overlay from object detection instead.
Why a face-on camera zooms out more
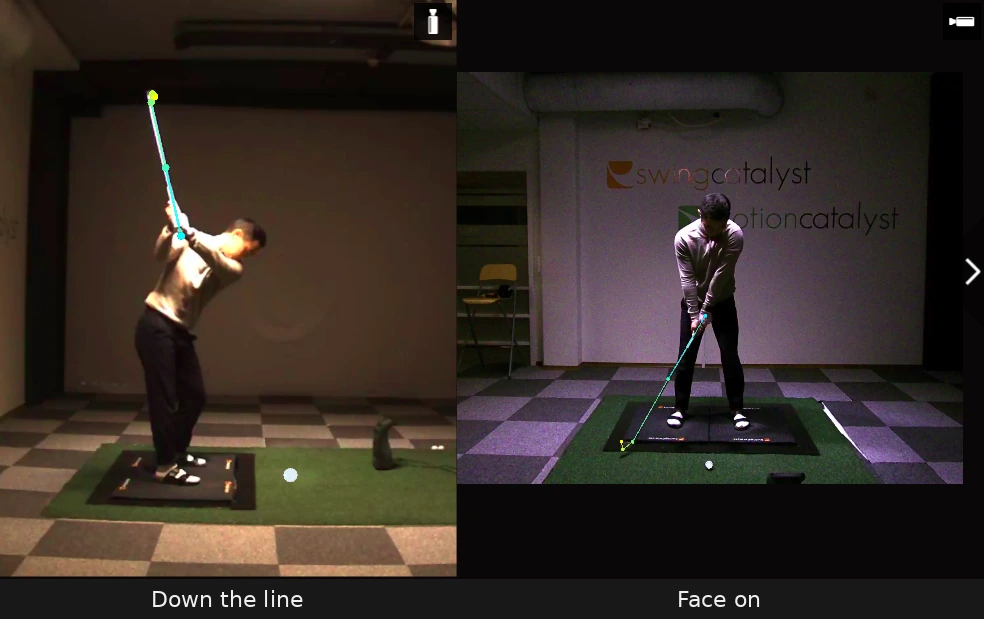
With Subject + objects, a face-on camera gives a noticeably wider view than a down-the-line camera on the same swing, and the athlete looks smaller. This is intended, not a defect.
The framing covers every position the club occupies during the measured span, not just where it is at one moment. How much room that takes depends on the camera angle. From down the line, the club moves mostly toward and away from the lens, so it adds little width to the picture. Face on, the same swing sweeps a wide arc across the image, and fitting that whole arc requires zooming out.
Showing the entire arc is what Subject + objects is for. When you want a tight view of the body on a face-on camera, switch to Subject mode instead.
The athlete stays centered at the edge of the picture
When the athlete moves close to the edge of the video, the framed view keeps them centered even if that means showing some blank space beyond the edge of the image. The zoom level stays constant. This is normal: the alternative, sliding the athlete off center to avoid the blank space, looks like the framing has stopped working at exactly the moment the athlete reaches the edge.
When framing is not available
A take without motion capture data cannot be auto-framed. The button of the selected framing mode shows a warning badge, and clicking a framing button shows a message naming the mode you asked for, for example “Subject + objects requires motion capture data”. The viewport stays at your current zoom.
To use auto-framing on such a take, process motion capture for it first: open the take in analysis mode, click the MoCap button in the toolbar, and click Process Mocap. On a take that already has motion capture data the same button reads Reprocess Mocap. See the Motion Capture Guide for details.
See also: Motion Capture Guide · Object Detection · What are markers?