
Getting Started - Swing Catalyst Home
Introduction
This article is the getting started guide for the Swing Catalyst Home.
There may be some variation between your product and screenshots in this guide.
Requirements
- A valid Home subscription
Swing Catalyst 9.7 or newer (Which version do I have?)
- Computer specifications:
Please note that Swing Catalyst will only run on Windows 10/11.
Foresight (FSX 2020/Play Recommended PC specifications) - Applies to Foresight customers.

Getting Started
This guide is split up into different categories & steps.
Microphone trigger (external page)
Installing the software and license key
For a step-by-step installation walkthrough, see How to install & uninstall Swing Catalyst .
With every new Swing Catalyst license there is an accompanying email with instructions. If you cannot find the email, please check your Spam folder or search your inbox
Follow the instructions to download & install Swing Catalyst, once installed enter the license key when prompted in the software.
Example email:
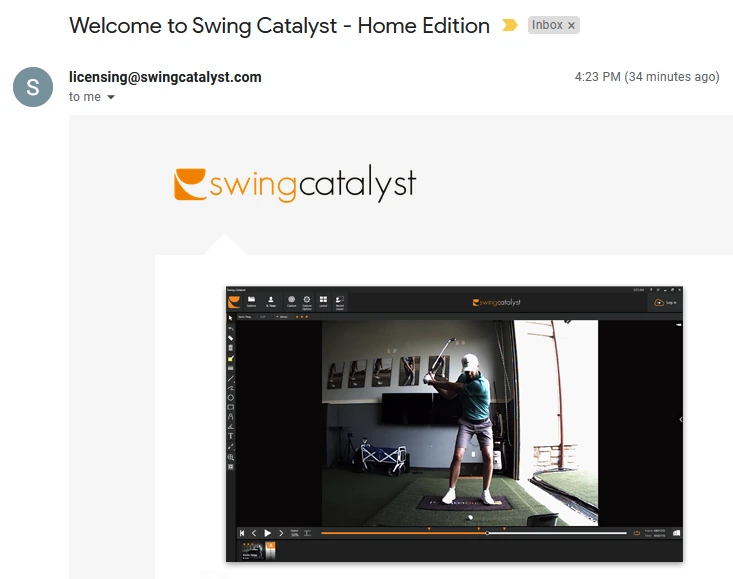
Having problems getting the license key installed? Please see our step by step article .
Connecting one or more cameras
Please see this list of supported cameras.
If you are using a FLIR, IDS or AVT camera, you may need to download & install appropriate drivers. Please take a look at our Driver section . If you are using a FLIR camera, please see our dedicated camera guides .
Note: We recommend making sure FSX and Swing Catalyst is not running before performing any camera related driver installation. Once the drivers are installed you may need to restart your computer.
From the main menu, settings can be found by clicking the gears icon.
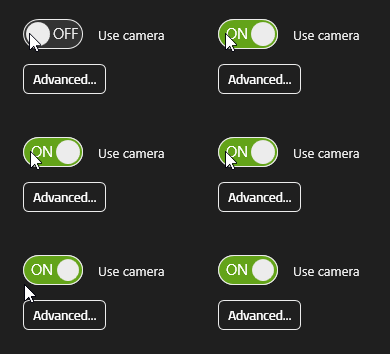
Detected cameras will automatically be listed in the camera list.
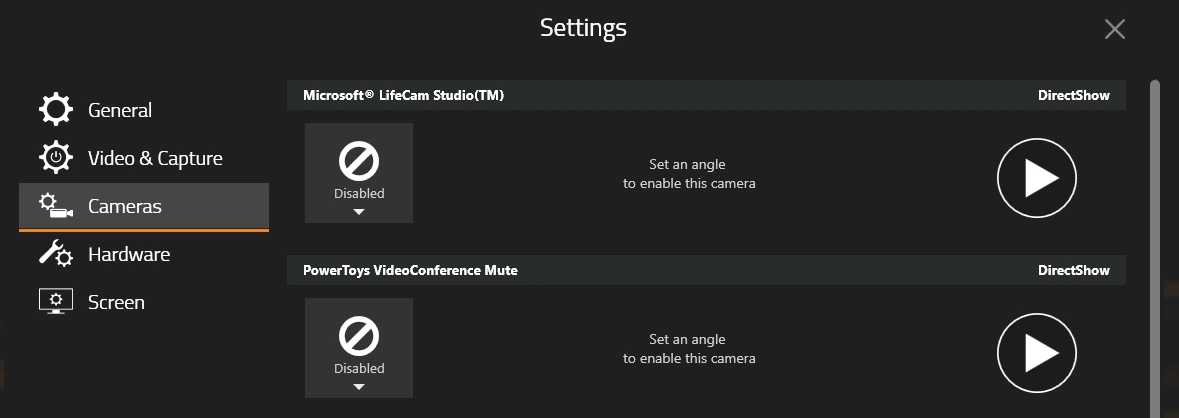
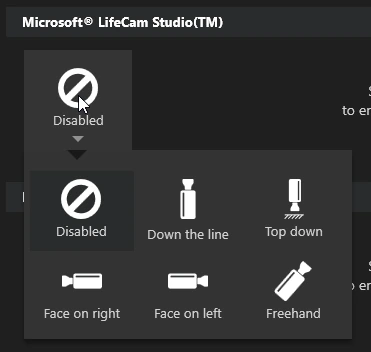
In order to use the camera it needs to have an angle designated.
Select an angle by clicking the disabled icon and then enabling the camera by changing “OFF” to “ON”.
Connecting a Launch Monitor
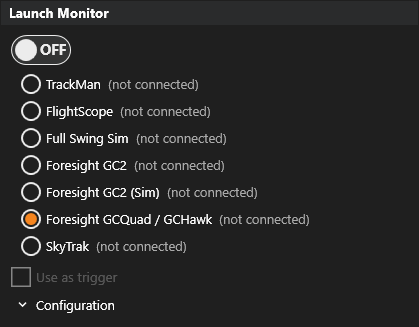
Under “Hardware Settings” you can choose between supported launch monitors.
In 97. and 9.8 you can select your launch monitor in the list, switch it to “ON” and enable “Use as trigger".
In version 10.0 and later simply turn on launch monitor support and press search. SC should detect any connected and compatible launch monitors.
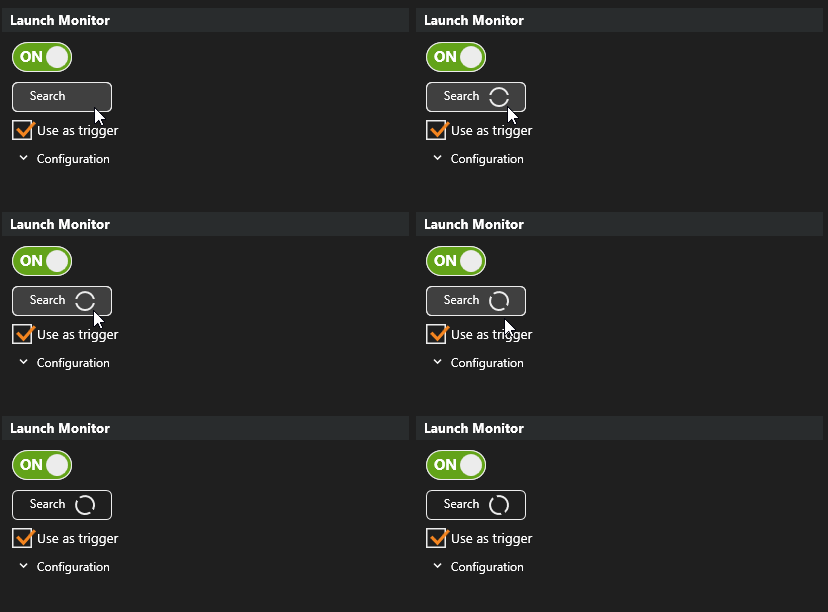
Make sure that the launch monitor is switched on and connected to the PC.
We always recommend using a wired connection if possible, .e.g. USB or Ethernet over WiFi.
For a more detailed description of how you set up your launch monitor, please refer to these guides:
*The Foresight GC2 integration does not support simultaneous connection with FSX, to use the GC2 with FSX, Foresight GC2 (Sim) must be selected.
If you selected a launch monitor as a trigger device, it will automatically record your swing while in capture mode. If you do not have a launch monitor, no problem, you can use a microphone as a trigger instead!
Creating a user
Create a user by following these steps and recording a swing.
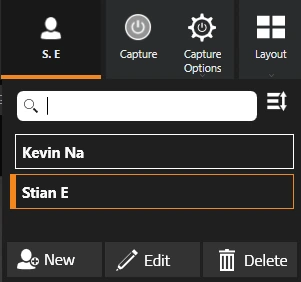
A user is automatically generated the first time you run Swing Catalyst. This user is generated based on the license details. If you wish to edit the profile information, feel free to do so.
From the main menu, click “Start”
Click the Select User drop down button and click “New”:
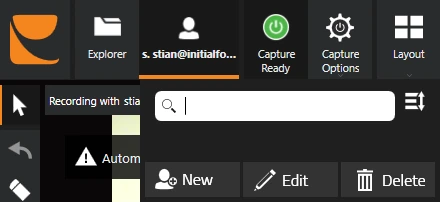
Note: A user is automatically generated based on your license details. To edit these details, click “Edit”. To add a new user, click “New”.
Enter a name and click “Save”
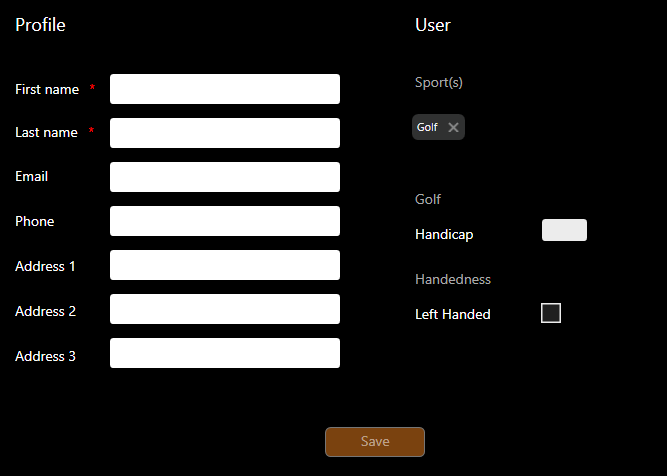 Some Home licenses have a max user restriction, this limits how many user profiles can be stored in Swing Catalyst.
Analyzing a swing
In this example screenshot from Ian Poulter we have recorded a swing with two high speed cameras along with our Motion Plate and a Foresight GCQuad as launch monitor.
- P.s: Tour Swings can easily be purchased from our web shop!
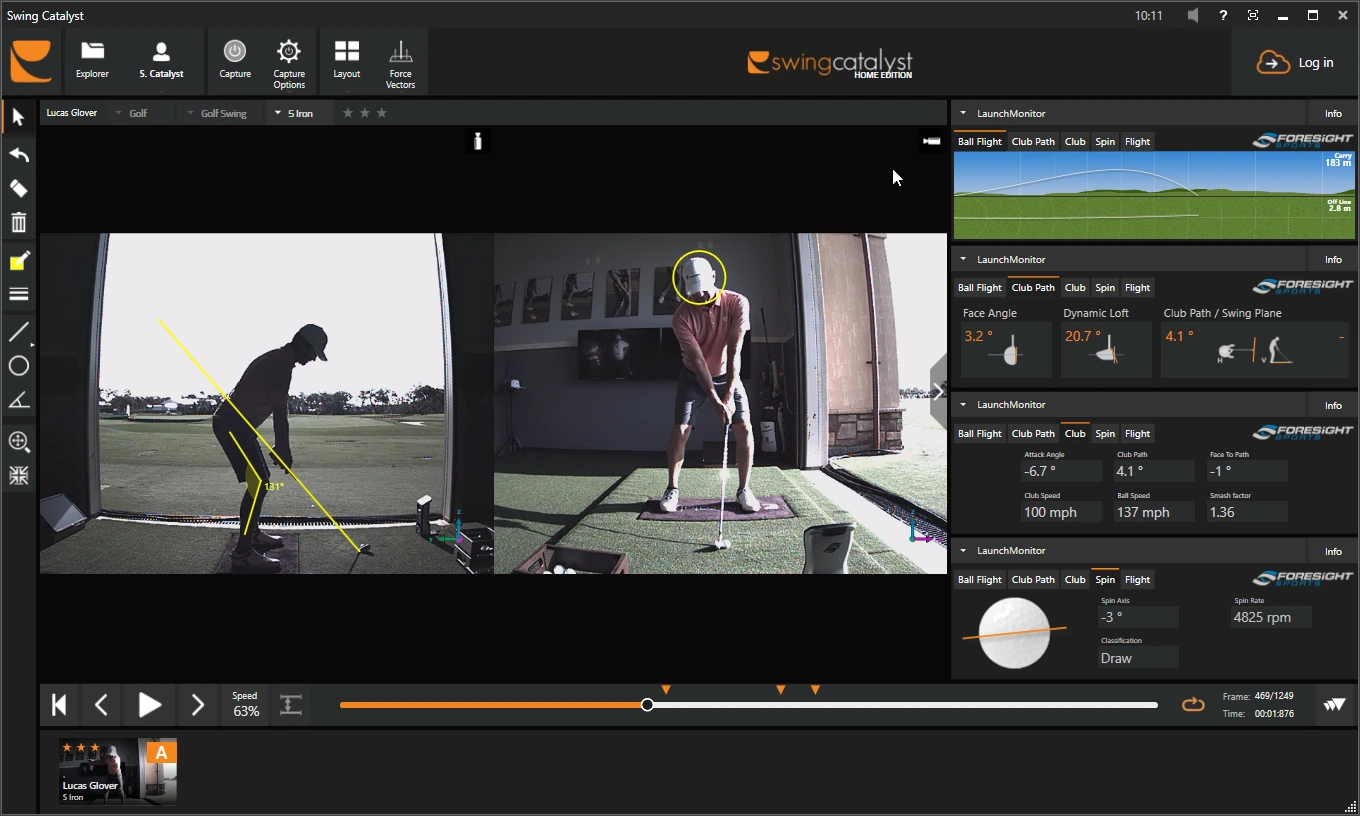
Let’s take a look at the Swing Catalyst interface and some of the menu’s and buttons.
The Analysis menu toolbar

From left to right: Menu, Explorer , Switch User , Capture , Capture Options and Layout .
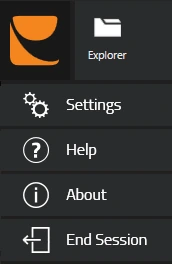
The Swing Catalyst icon is also the menu button which serves as a quick way to access settings and ending the current session.
Switching Users
Capture
In order to record a swing you need to be in capture mode.
When clicking the “Capture” button you automatically go from playback to capture mode.
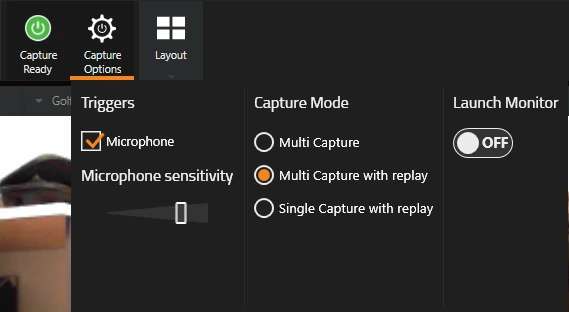
The “Capture Ready” icon in green signifies that the system is ready to capture. With Swing Catalyst Home you will enter this mode automatically on starting a session!

“Capture Ready” simply means that the capture mode is armed and Swing Catalyst is actively streaming data. Only saved once a trigger event has happened e.g. (manual trigger, launch monitor, microphone).
Capture Options
Choose between different trigger options such as microphone or launch monitor, and change capture modes.
Layouts
You can choose different layouts in Swing Catalyst by using the “Layout” drop-down button.
Swing Catalyst remembers the last layout used in Playback and Capture mode respectively.
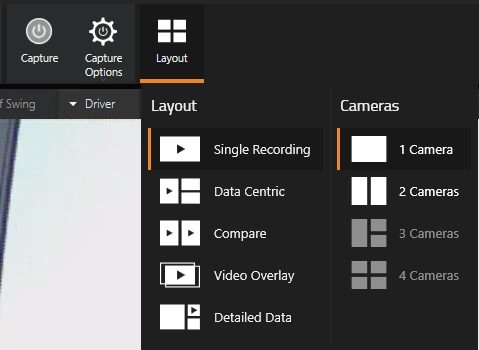
As visualized in the iconography, the layouts have some differences in what is shown and how it is shown.
Example of the “Single Recording” layout with 2 cameras.
The “Compare” mode layout with one camera:
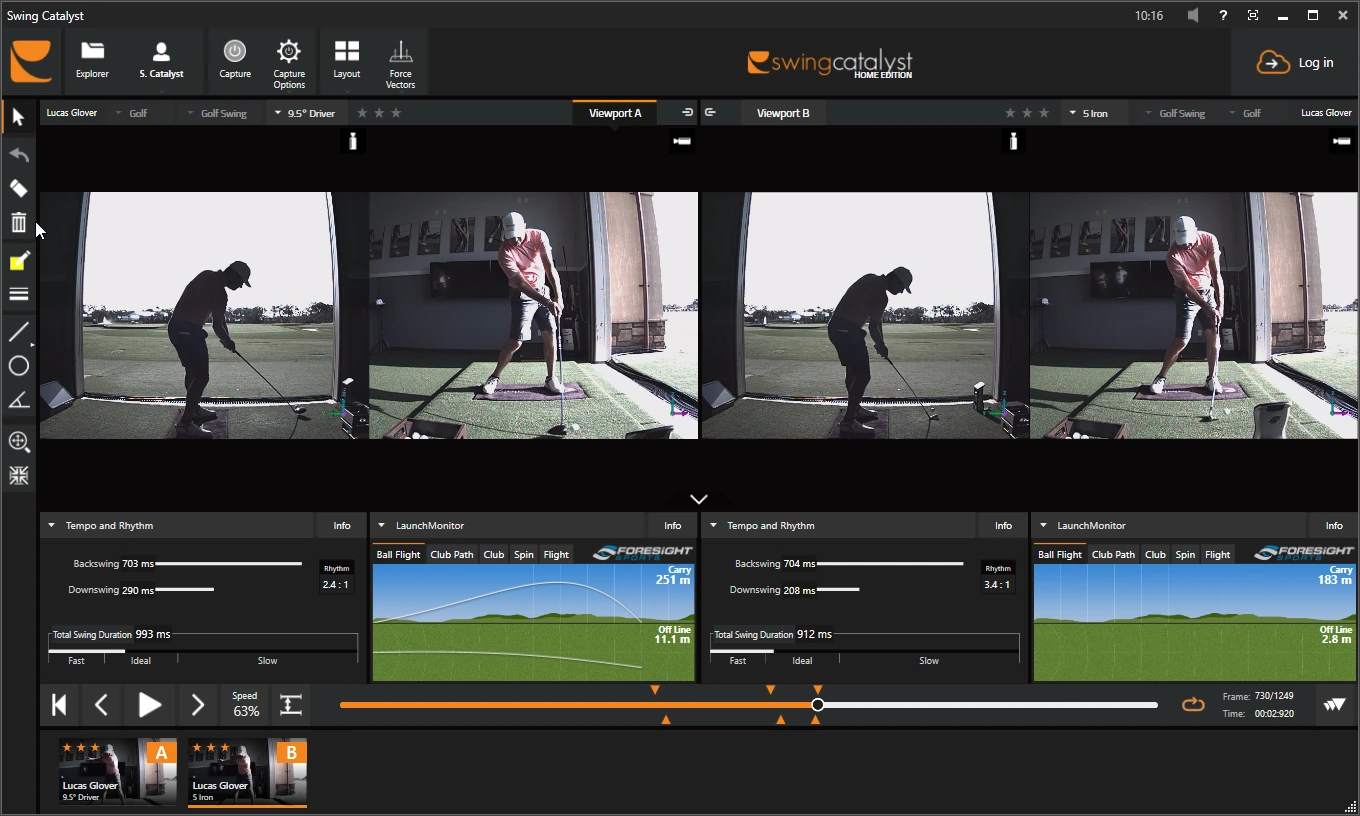
Here the recordings are split into two separate “view ports”, “A” and “B”. If we look more closely at the bottom of the screen, previously recorded (or opened) recordings show up in the stack.
The Stack
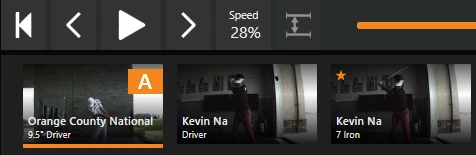
The stack shows the last recording with the newest recordings leftmost.
In this example the recording tagged with an orange A is to show that this recording is open in “View port A”. The orange underlining of the recording indicates it’s selected.
You can quickly view information about a recording by clicking it once:
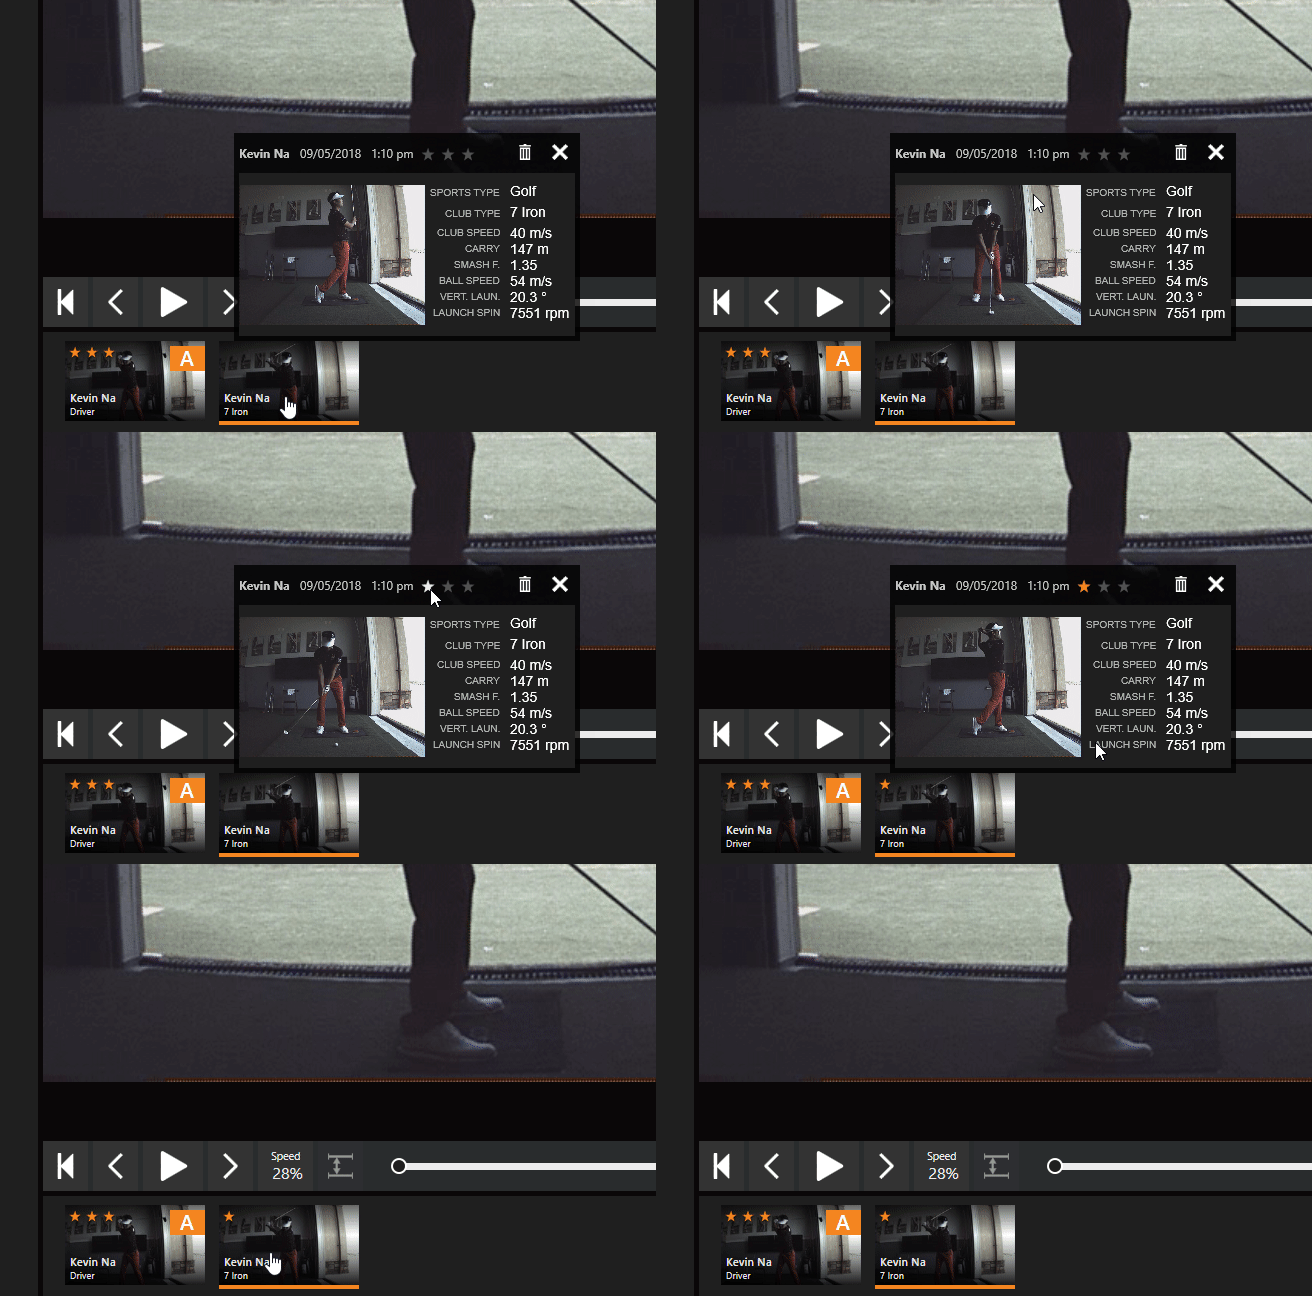
It’s also possible to give a rating (1-3 stars) to a recording. For example, you can filter by rating in the Explorer
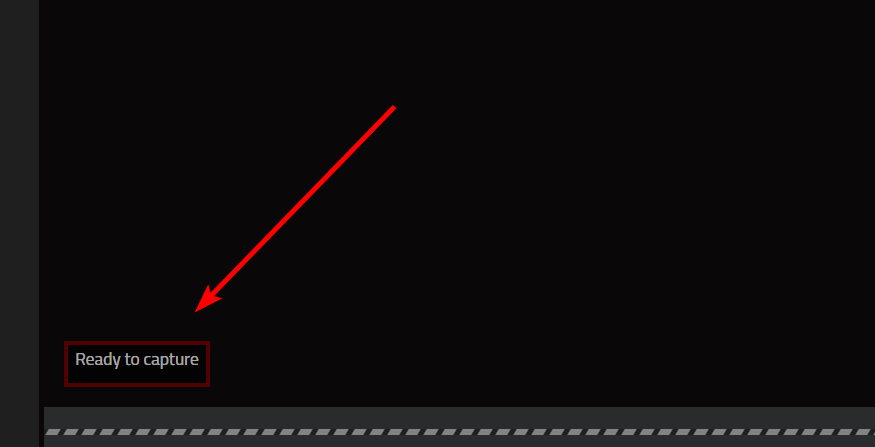
In capture mode, Swing Catalyst shows its capture status, for example Ready to capture, at the bottom left of the video area.
Recording progress & status is indicated by the progress circle where the stack is. The “Discard Recording” button allows you to cancel the recording at any time.

The indicator can be clicked to reveal more details about what is being processed.

Camera layouts selection
In the same dropdown menu, “Layout”, you can select the amount of different camera angles to show, depending on the layout. In playback mode (when viewing a recorded swing) the camera selection depends solely on how many cameras were used to create the recording.
In capture mode, the amount of visible cameras depend on how many cameras you have enabled on your system, and whether or not the license supports the amount of cameras you wish to use.
Switching camera angles
If you have recordings with more than one camera it’s possible to change the viewed camera by clicking the camera icon.
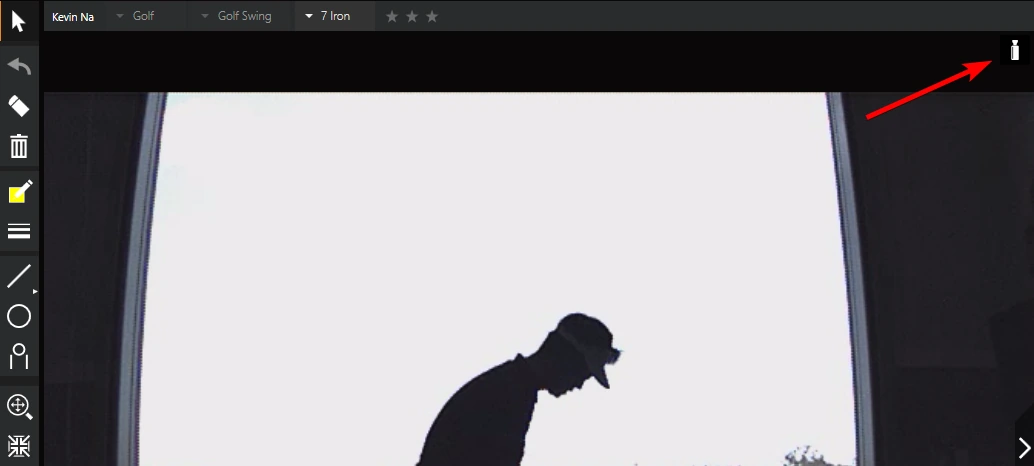
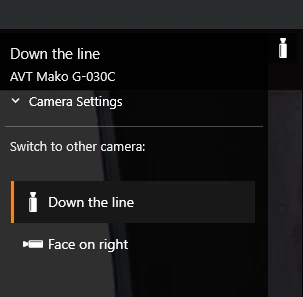
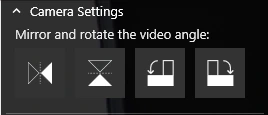
It’s also possible to do some minor camera adjustments from here such as mirror and rotating the camera angle. These changes apply to the recording only, and can be helpful if you wish to compare a left handed user with a right handed etc.
Drawing Tools
As seen in the screenshot above, the drawing tools can be found on the left hand side of the software.

Drawing tools allow you to draw on top of the video image, both on already recorded videos, but also on the live video “feed” (while in capture mode).
The line tool has a selection of different line types to choose from, the standard “Line” allows you to create a straight line between any point.
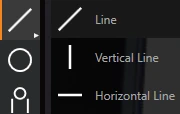
There are three different line thicknesses to choose from.
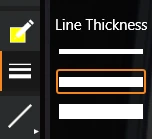
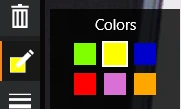
Different colors make it easier to distinguish between different lines.
Zoom And Pan Tool
At the very bottom of the toolbar below the drawing tools, is the zoom and pan tool and the “Fill Video View” button.
It’s also possible to zoom & manipulate the video image by holding the Ctrl button and scrolling the mouse wheel at the same time.
Explorer
You can easily manage your recordings here. The Explorer is grouped into three “sections”:
On the left are users that are registered in the system, in the middle are all of the recordings for the respective user, and on the right is the preview section.
Recordings are automatically grouped into sessions and sorted by date.
- Click on a swing and it will automatically preview in the “Preview” section (on the right).
You can also open recordings by right clicking and selecting which view port you wish to open them in, or alternatively drag the the “Drop Recording here” zones at the bottom.
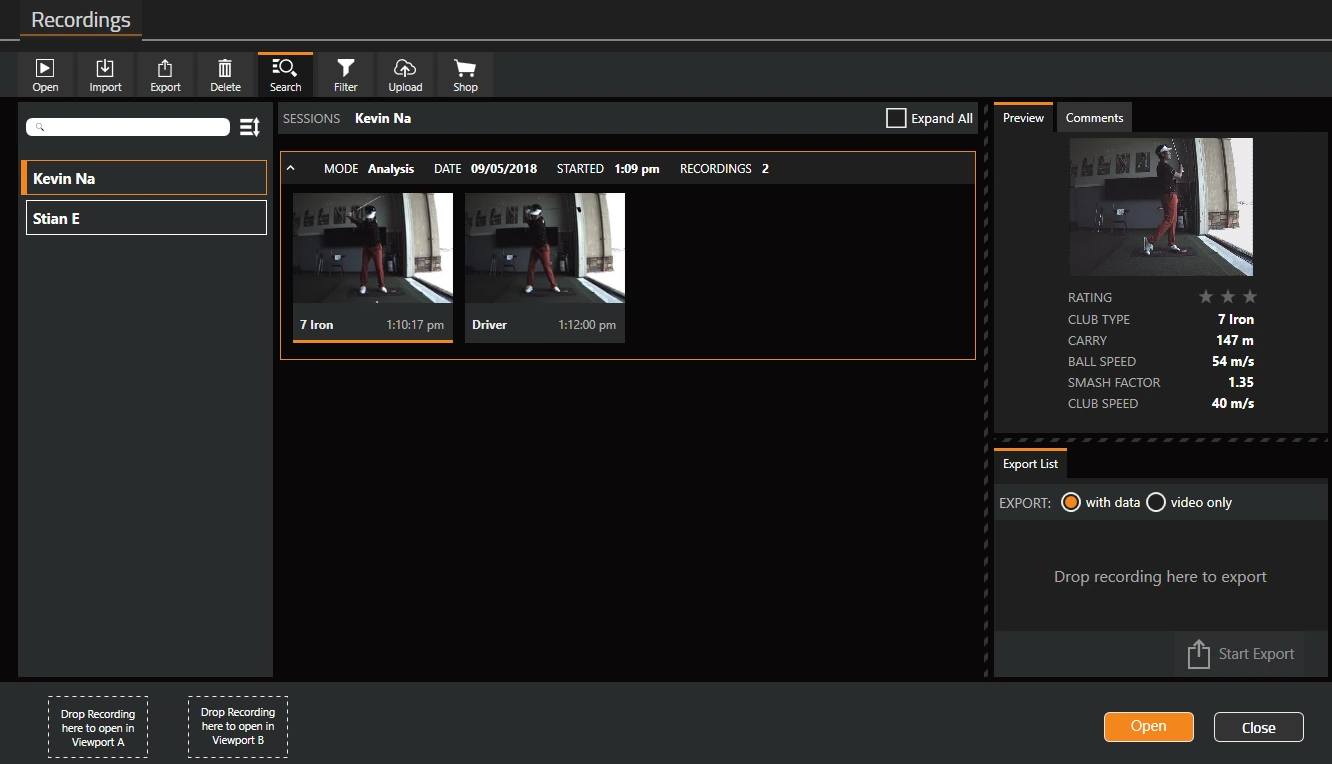
A closeup view of the Explorer menu

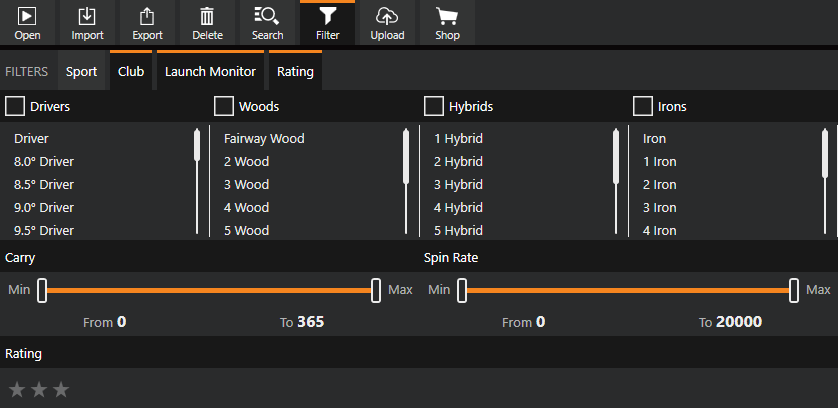
Filtering
It’s possible to filter recordings based on different collected parameters such as:
Sport (Although Swing Catalyst is only used for golf it’s possible to view recordings from different sports)
Club type
Launch monitor data (carry distance, spin rate or smash factor)
Rating (1-3 star rating)
This screenshot shows some of the filtering options available.
Resources & Troubleshooting
Here you can find resources and troubleshooting tips to solve the most common problems.
Most common problems
Most common problems users face are usually related to externally connected hardware, whether it is a camera, launch monitor, or sensor plate. Something as simple as a bad cable (for example, too long of a cable, or a incompatible USB extender) can cause problems. Therefor this section of the guide aims to help you either solve the issue or narrow down the cause of the issue.
Camera Troubleshooting
Related articles & troubleshooting steps:
Camera(s) not showing up in the camera settings list
If the camera is not showing in the camera list the camera is not detected or connected properly.
If the camera isn’t showing up in the camera list it’s most likely not recognized in Windows or in use by another application. Try disconnecting the camera and reconnecting it.
The camera might not be supported by Swing Catalyst .
For The Imaging Source cameras: If you have the manufacturers driver installed you might need to uninstall it for it to work.
Ethernet (network) / GigE cameras might require IP configuration.
No Data received
This indicates that Swing Catalyst is not receiving any video images or data to process.
Examples of causes for this type of error can be:
Bad cable/connection: Try to disconnect the camera and connect it to a different USB port.
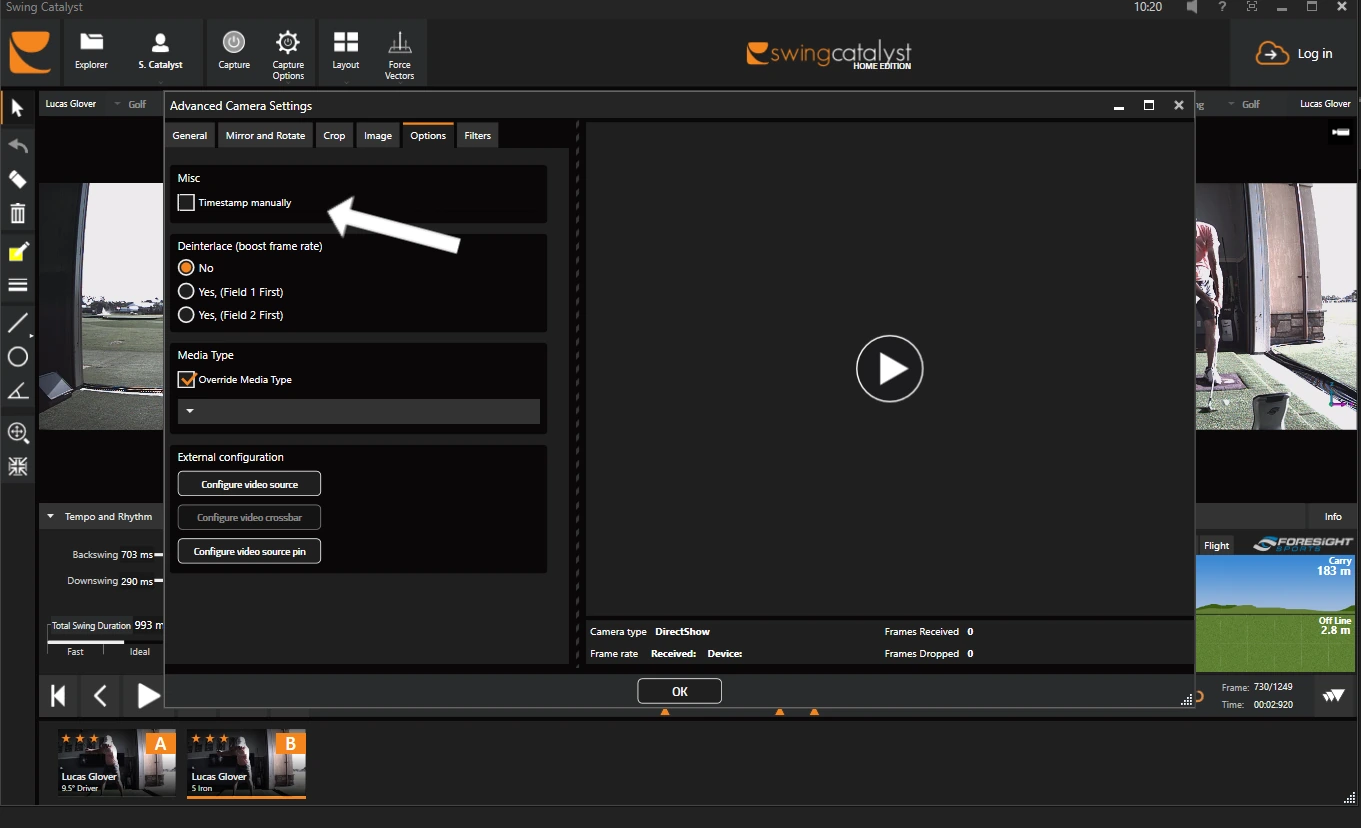
Erroneous settings: (Especially for web cameras and DirectShow cameras). Check the exposure setting, if auto-deselected and exposure is set very high the frame rate can drop significantly.
One fix for webcams may be to enable “timestamp manually” (see image below)
Something went wrong
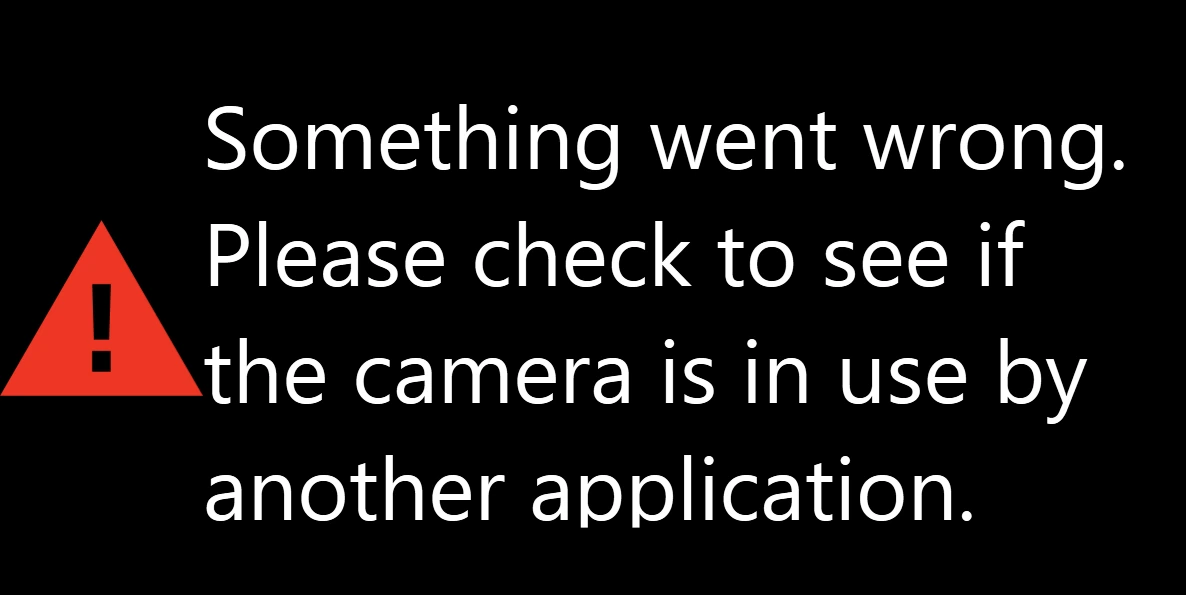
This type of error is common if the camera is in use by another application. Especially web cameras can easily be in use by third-party software, try to close other programs and restart Swing Catalyst.
Dropped frames / Insufficient data Received
Dropped frames means the video frames/data that is transferred from the camera to the computer is lost in varying degree. Especially with multiple cameras, this is not good because suddenly one camera is missing parts of the swing. Swing Catalyst warns about this, and if the system is dropping too many frames it won’t be possible to trigger a recording.
Causes for this could be:
USB3 camera connected to a USB 2.0 port.
Using poorly designed cables or extender cables.
Exceeding the recommended cable length.
USB3 camera connected to a USB hub with other devices sharing the same hub, lack of bandwidth.
Ethernet camera connected to a network port that is not properly configured or doesn’t support jumbo frames.
Camera uses too much bandwidth vs what is available on the system.
Tips:
For USB cameras our recommendation is to try to lower the frame rate (and or device link throughput - for FLIR cameras) to reduce the bandwidth consumption.
Lowering the frame rate (and or device link throughput).
If using multiple cameras, try to unplug or disable some cameras, does the system still report drop frames?
Examine cabling, are the cameras connected to a USB hub or extender? Try connecting them directly to the computer.
Try closing other software that is CPU and Graphics intensive to free up resources.
Launch Monitor Troubleshooting
- Launch monitor’s support article section
Here you can find a list of common issues with launch monitors and how to solve them.
Scenario: Device not connected
In the example scenario above, the launch monitor is enabled in settings but device is not connected / recognized.
Suggested troubleshooting steps:
Check if the device is still turned on.
Try to restart the device.
Try to connect over USB or Ethernet where possible instead of WiFi.
Try to connect with the manufacturers software to confirm whether or not it’s possible to connect.
Scenario: Not triggering recordings.
Launch monitor is connected and recognized but not triggering when in capture mode.
Suggested troubleshooting steps:
Make sure trigger option is enabled.
Does ball and or club data appear on the device? (Can you verify it works outside of Swing Catalyst?).
Are there any dropped frame or insufficient data warnings? Swing Catalyst will not trigger while a camera reports insufficient data, which heavy frame loss can cause.