
How to configure IDS uEye GigE camera with Swing Catalyst
For USB camera setup please see this article: How to use IDS uEye USB cameras with Swing Catalyst
This article assumes you have installed the uEye drivers found here: https://www.swingcatalyst.com/drivers
This article covers setting up the IP addresses of both the camera & network card.
Swing Catalyst does not support IDS AOI (area of interest) for IDS cameras.
Compatible network adapters & configuration:
Please see: gige-network-setup.md
Important for performance: If you have an Intel network card, please download & install the Intel drivers, as this will give you options to set interrupt moderation rates, which may be unavailable with the Windows drivers.
Setting up your IDS uEye GigE camera(s)
Steps:
Before proceeding install the IDS uEye drivers. Locate & open the IDS Camera Manager application (it can be found in: C:\ProgramData\Microsoft\Windows\Start Menu\Programs\IDS).
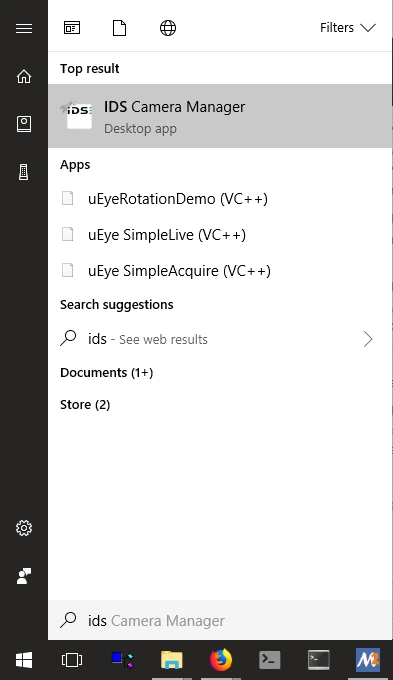
The IDS Camera Manager application:
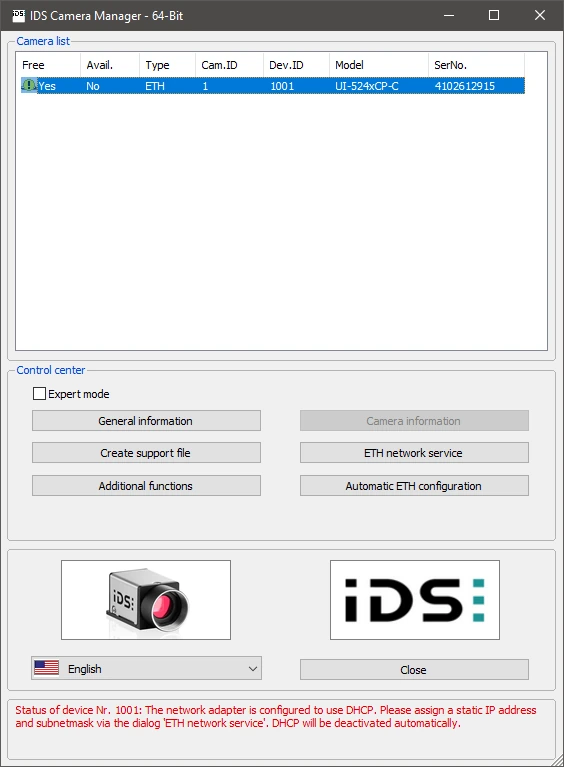
Note the warning on the bottom of the application. There are several warnings that can show up due to IP addresses being wrongly set, or related to the camera’s firmware.
Example:

Note, on the IP address configuration & our recommendations
We recommend one dedicated network card, or network interface, for each camera.
Our recommended IP Setup:
Each camera and Ethernet card (also known as NIC) should be configured with static IP’s on different subnets (and a subnet mask).
Example:
Cameras on network card 1: nic ip: 10.0.1.1 cam ip: 10.0.1.10 … 10.0.1.20 subnet mask:255.255.255.0
Cameras on network card 2: nic ip: 10.0.2.1 (different subnet from nic1) cam ip: 10.0.2.10 … 10.0.2.20 (different subnet from nic1) subnet mask: 255.255.255.0
Enabling the uEye network service
Note: If you’re using different camera types from different manufacturers having the uEye network service enabled may cause problems when using a camera from a different manufacturer.
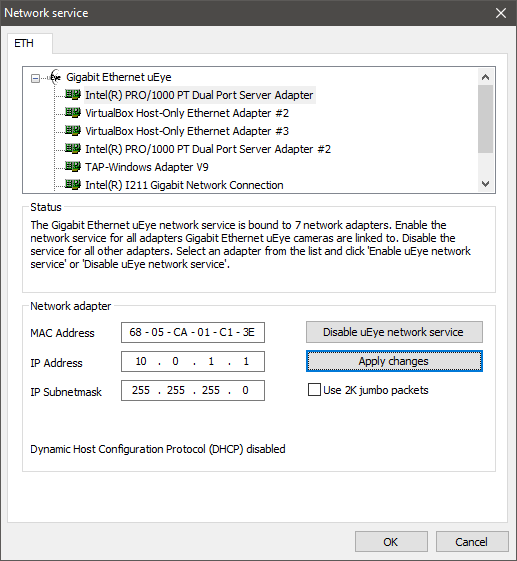
Click on ETH network service
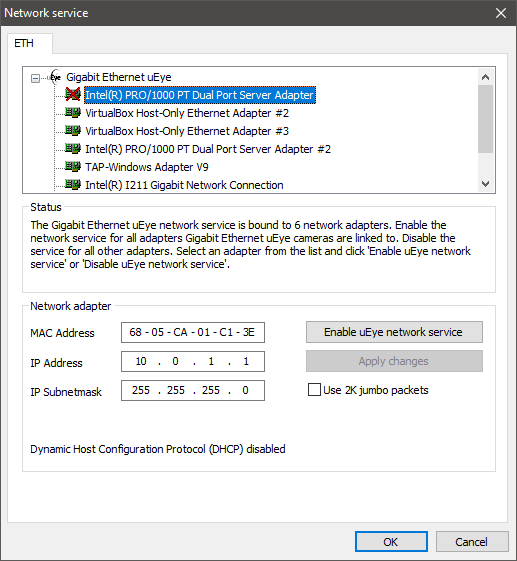
Select the network adapter you wish to configure (in this case it is the dual port adapters)
The graphic of the network card is grayed out, this is because it’s not setup correctly. The uEye network service needs to be enabled for the camera to be visible on the network.
Make sure to set the IP address & subnet mask as recommended (see above), then click Enable uEye network service & click Apply changes (you’ve now set a static IP address for one of the dual port adapters!).
Automatic IP setup (for manual IP see below)
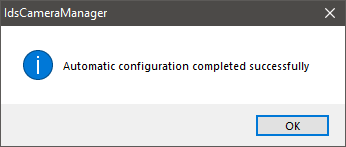
To use the automatic IP setup configuration click on Automatic ETH configuration & click OK.
The IDS Camera Manager will have set a IP address on the network card & the camera automatically for you.
Note: We recommend a manual IP setup when using multiple cameras.
Manual IP setup
Back in the IDS Camera manager, you now should see the camera(s) listed. Since you previously set a static IP address of the network adapter, you now need to set a static IP of the camera so that the network adapter & camera can communicate between each other properly.
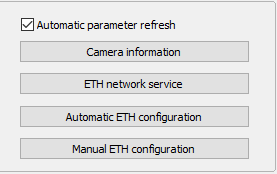
Check the Expert Mode box as seen here:
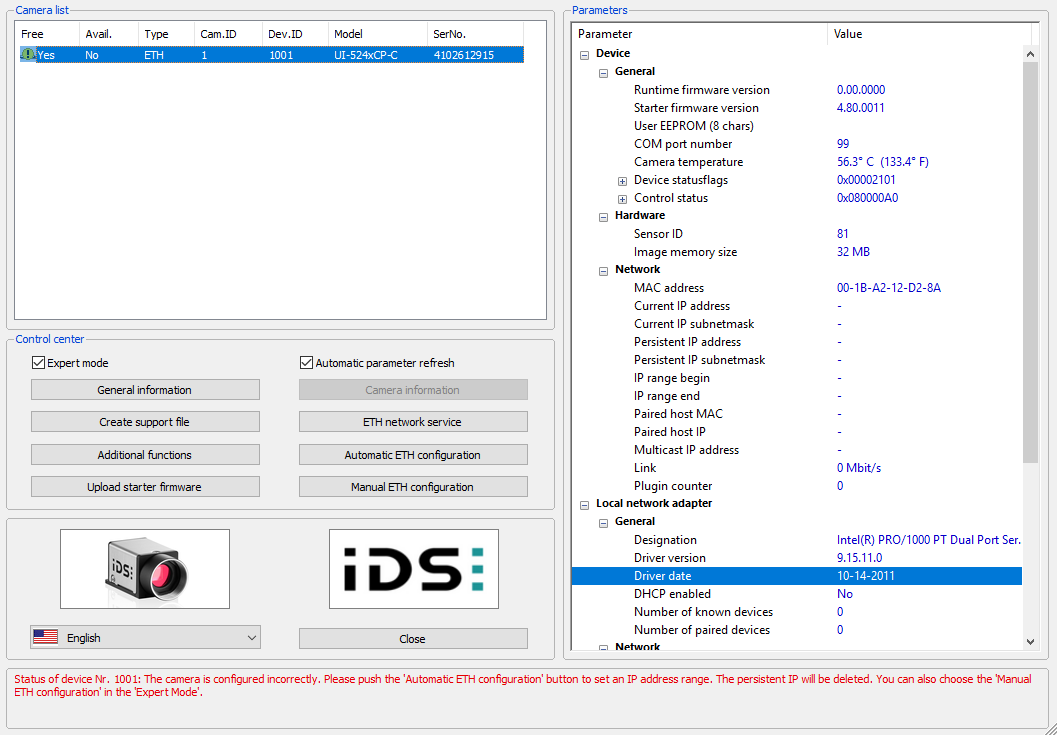
Note the warning above in red.
Click Manual ETH configuration:
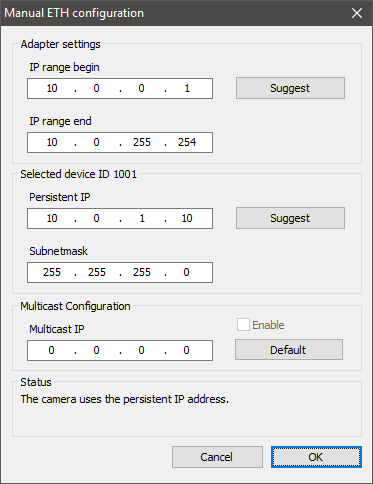
In the screenshot above the IP address of the camera is set to 10.0.1.10 (our network card is 10.0.1.1). Enter as seen in the screenshot above & click OK.
Note, setting static IP addresses is not needed but highly recommended as automatic IP configurations can cause trouble with IP address conflicts, e.g the same IP address being used elsewhere. We highly recommend setting up a static setup for all studio installations.
Rinse & repeat for other cameras & NICs as per our recommended IP configurations above.
Configuring the Network Adapter(s) to be used with IDS uEye cameras
Assuming you now have setup static IP addresses for both the camera(s) and the network card, lets move on to configuring the network adapter for best performance.
From the Control Panel\Network and Internet\Network Connections double click on the adapter you want to configure, in our case it’s Ethernet 4, Intel (PRO/1000 PT Dual port).
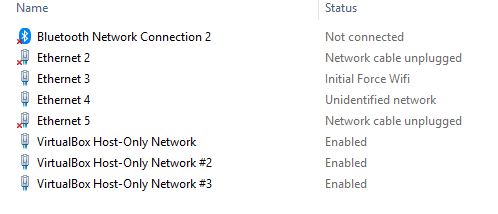
Double click on the network adapter you wish to configure.
Click the Advanced tab. Note: The configuration is different for each network adapter and depending on the driver, please refer to your network cards documentation for specific information on how to change the specific settings shown below.
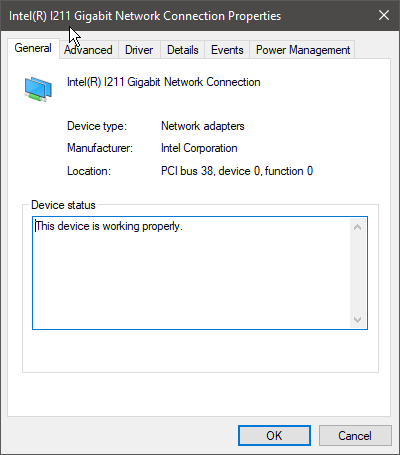
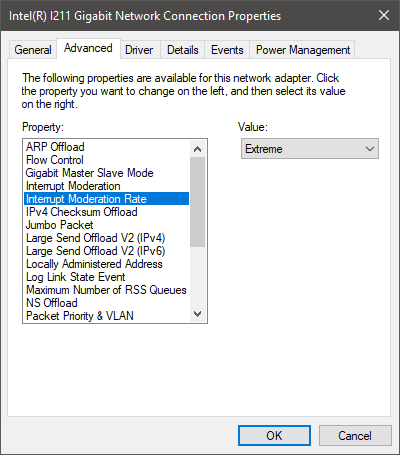
Ensure Interrupt Moderation is enabled and the Interrupt Moderation Rate is set to Extreme.
If you do not have Extreme as an option set it to High.
In some circumstances turning interrupt moderation off can help if none of the high value interrupt moderation rates work, but as long as you have a recommended network card the High & Extreme options should be available. Interrupt moderation being enabled is crucial to lowering CPU usage when handling large amounts of packages, especially on higher resolution & or high FPS camera’s.
Interrupt moderation rate:
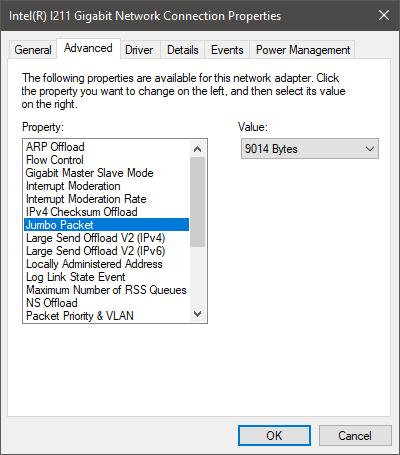
Enable support for Jumbo Packets (set it to 9014 Bytes):
Receive Buffers:
It’s recommended to set this value as high as it can go. This can help avoid dropped frames when using multiple camera’s & or higher resolution GigE camera’s.
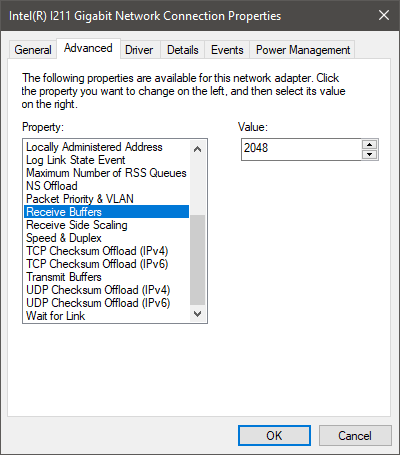
Using a network switch:
If you are to use a network switch it’s important that the switch supports 9KB Jumbo Frames, & that the network adapter is configured to use 9KB Jumbo Frames. However, in some cases some switches may not work well with 9KB frame sizes, in those cases it’s recommended to lower from 9KB to a lower number & retest the setup.
Using the camera(s) in Swing Catalyst
After having configured the IP addresses and network adapters per recommendations above, you can start Swing Catalyst & the camera should be visible in the camera list.
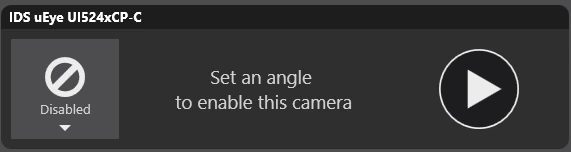
Set a camera angle and enable the camera, then click Advanced…
Make sure the pixel clock is at maximum (or lower it if you are dropping frames).
Set the shutter speed & gain (note these values can change a lot depending on requirements, type of camera and how much light you have).
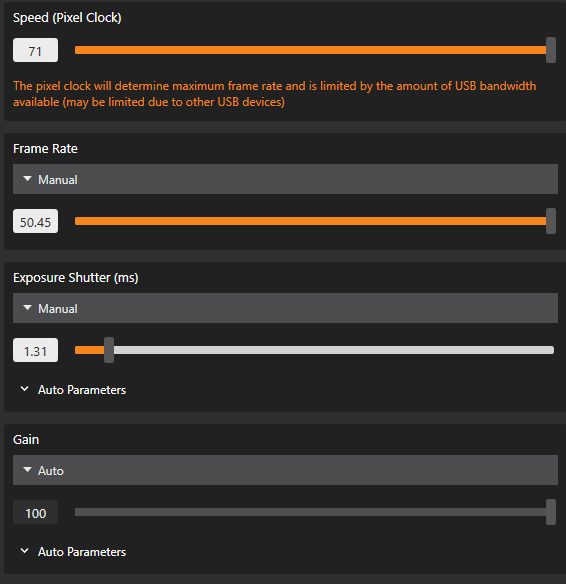
Troubleshooting IDS cameras
If you’re dropping frames, or having problems with sync with your IDS uEye GigE camera, use the uEye Cockpit utility.
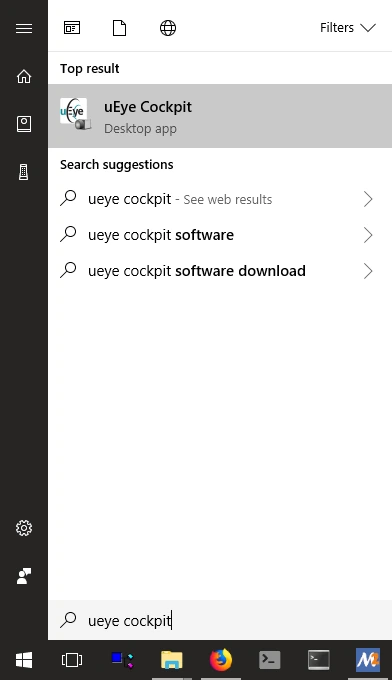
Click Live Video
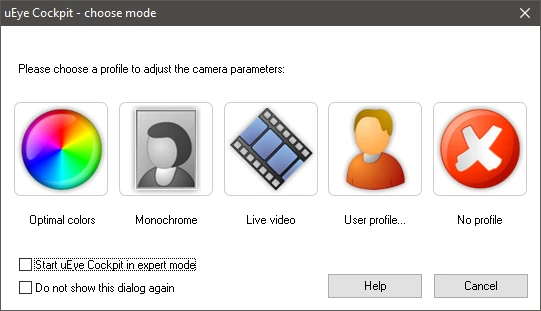
Click the play icon then click on the wrench

Note the bandwidth usage listed. Under the Camera tab, up the Pixel clock & check the Max checkbox under Frame rate (Freerun) and then drop the exposure time (shutter speed) down.
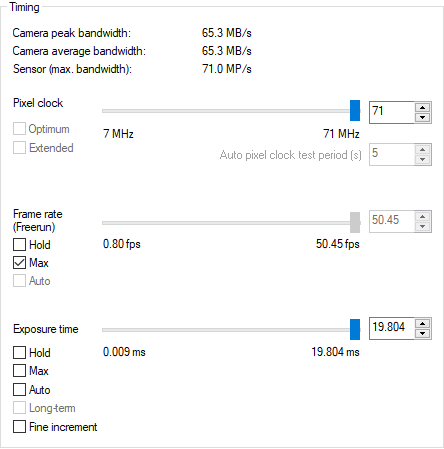
After setting up your cameras to stream live, click on View -> Performance Overview
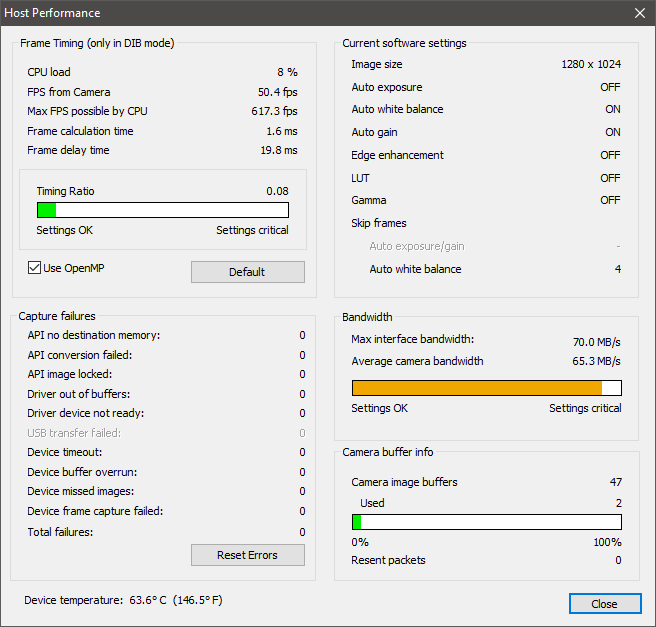
The Host Performance view can be very helpful to troubleshoot if you’re having problems with stability & dropped frames.
Using the status bar in the uEye Cockpit to indicate dropped frames or connectivity issues while streaming video:
Resolution of the camera, Frames received, Frames displayed, Failed frames & Re-connectivity attempts as per the screenshot:

Transfer OK & Frame rate can also be seen in the status bar:
