How to set static IP on FLIR Blackfly GigE cameras
Introduction
This support article describes how to configure your Blackfly (or Blackfly S) GigE cameras with a static IP address. For normal use this isn’t required as Swing Catalyst handles the IP configuration automatically.
Requirements
The Spinview application (a part of the Spinnaker SDK).
Swing Catalys.
One or more FLIR Blackfly (or Blackfly S) GigE camera(s).
Installing Spinnaker
Download and run the Spinnaker installer.
Right click the Spinnaker installer & run as administrator.
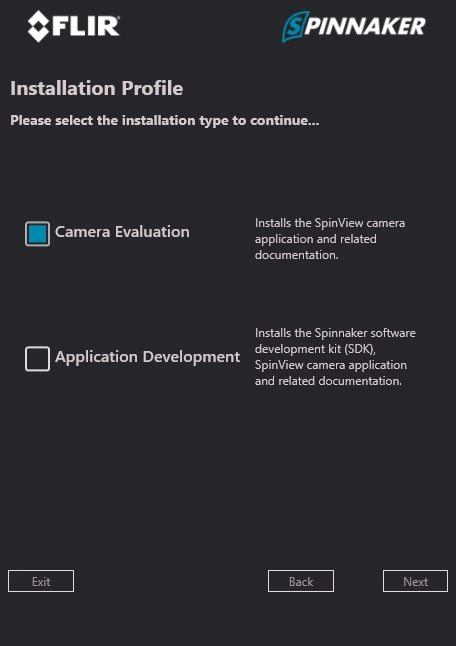
Check “Camera Evaluation” and click Next
Follow the on-screen instructions to proceed with the installation.
Once finished, reboot the computer.
Setting a static IP on the Ethernet Adapter
Each camera and network adapter must have its own unique static IP address. For example, if you assign a static IP addresses to a cameras, ensure that the network adapter is configured with a corresponding IP from the “recommended static IP configuration” matrix below.
Configure network adapters based on the associated camera, not the adapter number. Change settings only for identified cameras; leave others unchanged. If you connect a camera to a different adapter, reconfiguration is necessary for proper functionality.
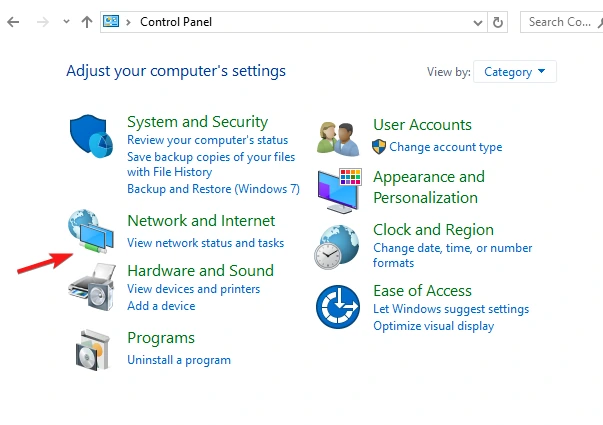
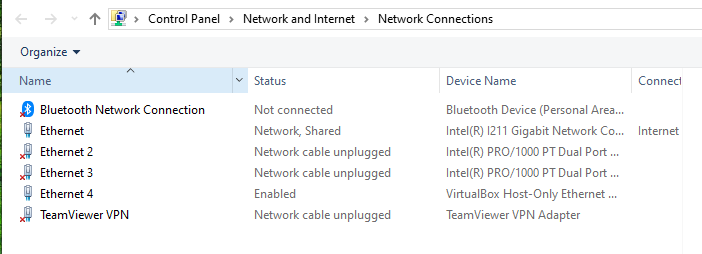
From the Control Panel, go to “Network and Internet”, then to “Network and Sharing Center” then click “Change adapter settings”.
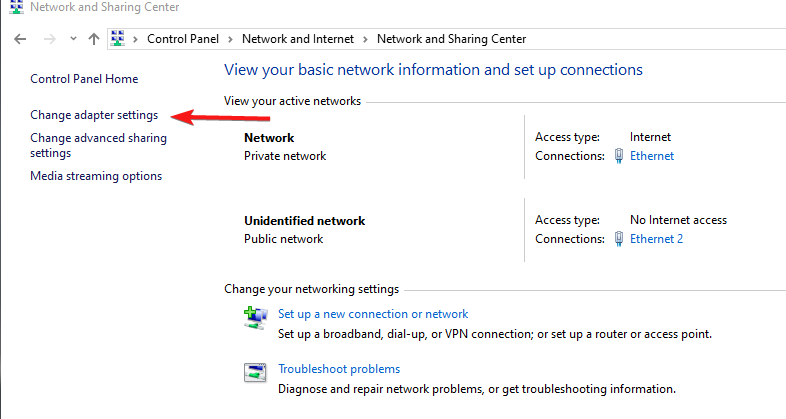
Here we can see a list of network adapters present on the computer. In our case we wish to configure Ethernet 2, and Ethernet 3, with device name “Intel Pro/1000”. It’s important we configure only the network adapters used for the cameras and not any others as it may impact internet connectivity.
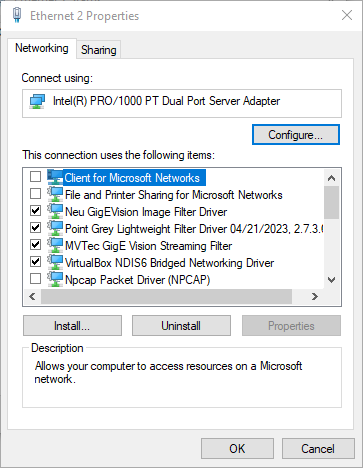
Right click on the network adapter you wish to modify and click “Properties”, then scroll down to “Internet Protocol Version 4 (TCP/IPv4) and click “Properties”.
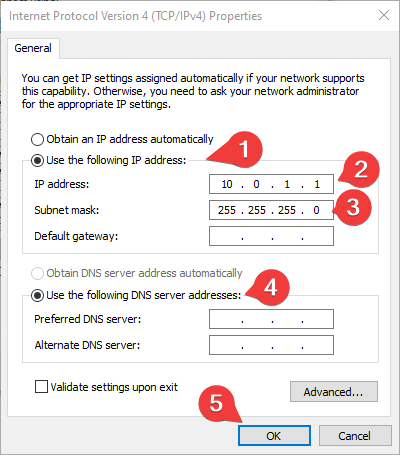
Select “Use the following IP address”.
Enter a IP address from the recommended static IP configuration matrix below.
Enter subnet mask 255.255.255.0
Select “Use the following DNS server addresses”, you can leave these empty.
Click “OK”.
Recommended static IP configuration
| Ethernet Adapter Number | Ethernet Adapter IP | Subnet Mask | Gateway | Connected to Camera | Camera IP |
|---|---|---|---|---|---|
| 1 | 10.0.1.1 | 255.255.255.0 | 10.0.1.1 | 1 | 10.0.1.10 |
| 2 | 10.0.2.1 | 255.255.255.0 | 10.0.2.1 | 2 | 10.0.2.10 |
| 3 | 10.0.3.1 | 255.255.255.0 | 10.0.3.1 | 3 | 10.0.3.10 |
| 4 | 10.0.4.1 | 255.255.255.0 | 10.0.4.1 | 4 | 10.0.4.10 |
Gateway can be set on both the camera
Setting a static IP on the camera
Repeat these steps for any other cameras you wish to set a static IP on. To access the camera IP configuration open the SpinView application and right click on the camera you wish to configure an IP for.
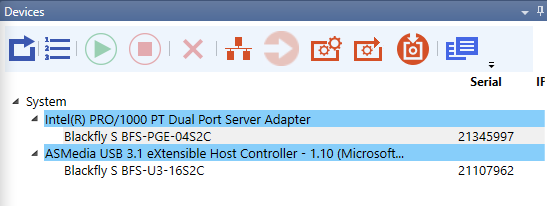
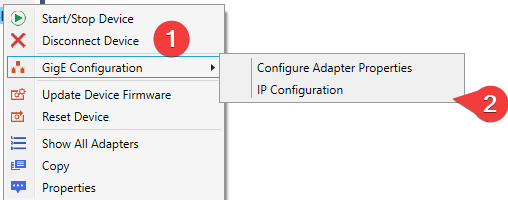
Right click on the camera in the Devices list and select “GigE Configuration”.
Click “IP Configuration”.
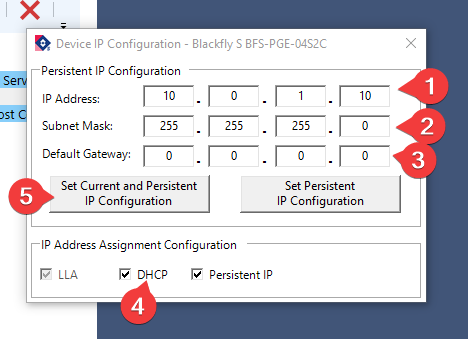
Enter the IP & subnet mask according to the recommended IP configuration matrix below.
Enter the IP address of the camera, use the IP address from the matrix, for example for camera 1
Enter the subnet mask, e.g: 255.255.255.0.
Default gateway can be empty, or use the IP address of the network adapter the camera is connected to.
Uncheck DHCP.
Click “Set Current and Persistent IP Configuration”.
Recommended static IP configuration for cameras
| Camera No | IP | Subnet Mask | Gateway |
|---|---|---|---|
| 1 | 10.0.1.10 | 255.255.255.0 | 10.0.1.1 |
| 2 | 10.0.2.10 | 255.255.255.0 | 10.0.2.1 |
| 3 | 10.0.3.10 | 255.255.255.0 | 10.0.3.1 |
| 4 | 10.0.4.10 | 255.255.255.0 | 10.0.4.1 |
The gateway IP is the IP address of the network adapter the camera is connected to.
For example, Camera 1 is connected to network adapter 1.
Using SpinView to enable jumbo frames & optimize the network adapters for the cameras
Please note these changes need to be done to all of the network adapters connected to your cameras.
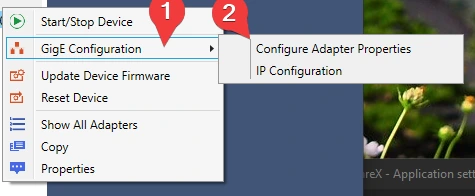
From SpinView, right click on the camera and select “GigE Configuration”.
Click “Configure Adapter Properties”.
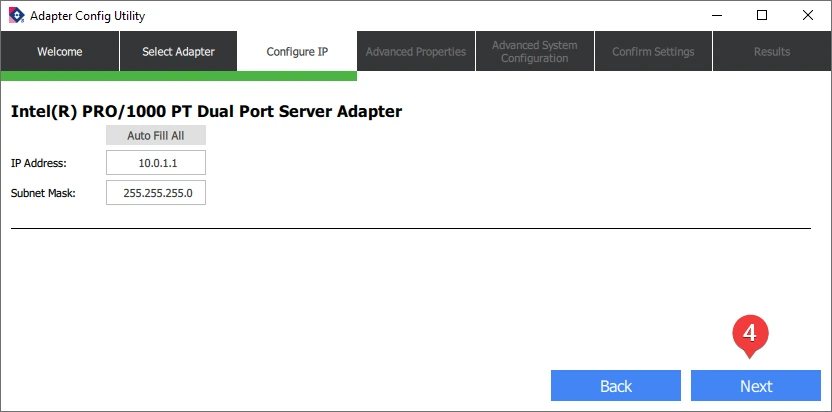
Click Yes when prompted.
Click “Next”.
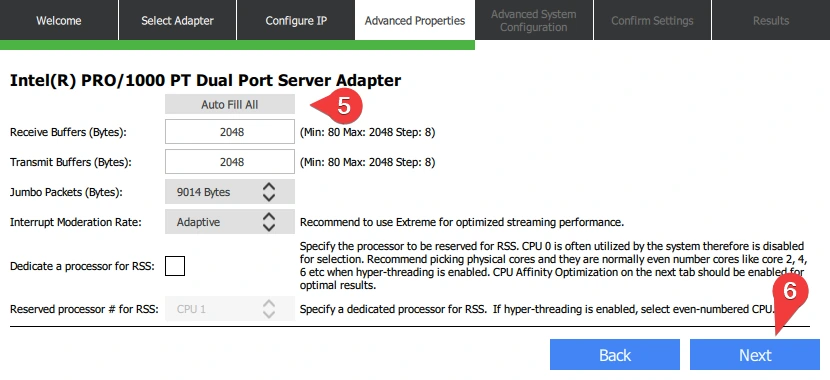
Click “Auto Fill All”.
Click “Next”.
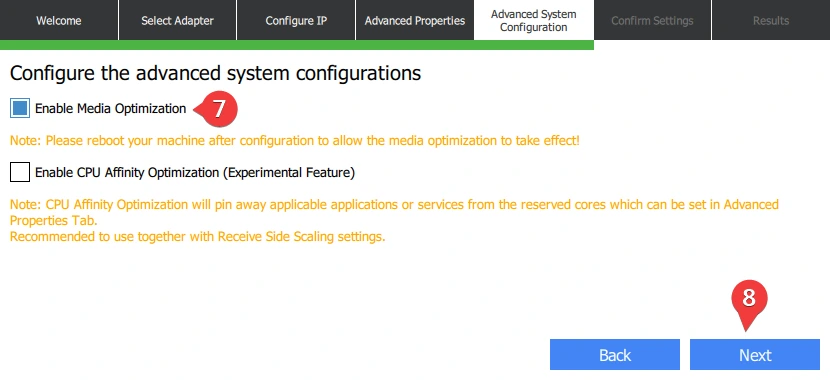
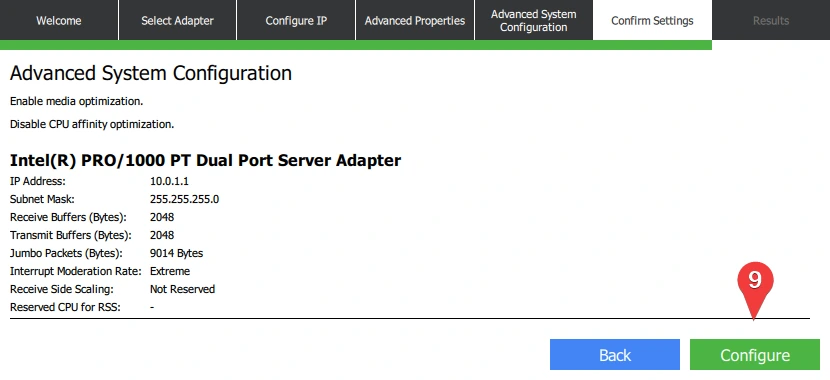
Check “Enable Media Optimization”.
Click “Next”.
Click “Configure” to make the changes.